Home deer processing setup – Welcome to the ultimate guide to home deer processing, where we’ll take you on a step-by-step journey from field to table. Get ready to master the art of transforming your hard-earned harvest into delicious, home-processed venison.

Equipment and Tools

Successful home deer processing requires the right equipment and tools. Essential items include knives, saws, grinders, and packaging materials, each serving specific functions.
A home deer processing setup can include tools for skinning, butchering, and preserving the meat. If you’re looking to add a unique touch to your setup, consider red deer stag antlers for sale. These antlers can be used as decorative pieces or even as handles for knives and other tools.
They’re a great way to add a touch of the wild to your home deer processing setup.
The following table provides a comprehensive list of recommended equipment and their respective functions:
| Equipment | Function |
|---|---|
| Boning Knife | Precisely removing meat from bones |
| Skinning Knife | Separating the hide from the meat |
| Hunting Knife | Field dressing and skinning |
| Meat Saw | Cutting through bones |
| Grinder | Processing meat into ground venison |
| Vacuum Sealer | Preserving and storing processed meat |
| Packaging Materials (Bags, Wraps) | Protecting and storing processed meat |
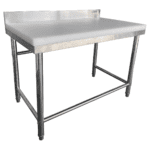
Workspace Setup
An efficient workspace is crucial for home deer processing. The ideal setup provides adequate ventilation, lighting, and sanitation, ensuring a clean and organized environment for optimal processing.

To maximize workflow, the workspace should be organized with designated areas for each processing stage, such as field dressing, skinning, and cutting. Proper ventilation is essential to remove odors and prevent the spread of bacteria, while adequate lighting allows for precise cuts and proper inspection of the meat.
Sanitation
- Maintain a clean workspace by regularly washing and disinfecting surfaces, equipment, and tools.
- Wear clean gloves and clothing to prevent contamination.
- Dispose of waste properly in designated containers to minimize the risk of attracting pests or spreading disease.
Field Dressing and Skinning
Field dressing and skinning a deer are essential steps in the home deer processing process. Proper techniques ensure the meat is safe, clean, and of high quality.
Before beginning, ensure you have the necessary equipment and a clean, well-lit workspace. Wear appropriate clothing and gloves to protect yourself from contaminants and sharp objects.
Field Dressing
Field dressing involves removing the internal organs of the deer. Follow these steps:
- Lay the deer on its back and make a midline incision from the sternum to the pelvic bone.
- Carefully remove the internal organs, including the heart, lungs, liver, and intestines. Avoid puncturing the organs to prevent contamination.
- Trim excess fat and connective tissue from the organs.
- Place the organs in a clean container for later disposal or use.
Skinning
Skinning involves removing the hide from the deer’s body. Follow these steps:
- Make a cut along the inside of the hind legs from the hock to the pelvic bone.
- Make a similar cut along the inside of the front legs from the knee to the shoulder.
- Starting at the hind legs, carefully separate the hide from the underlying muscle tissue using a sharp knife.
- Work your way around the deer’s body, gradually peeling back the hide.
- Once the hide is removed, trim any remaining fat or connective tissue.
Butchering and Cutting
Venison is a delicious and nutritious meat, and butchering a deer into different cuts is a great way to maximize its flavor and versatility. Here are the different cuts of venison and how to butcher a deer into those cuts:
- Backstrap:The backstrap is the most tender cut of venison, and it is located along the spine. It is best cooked quickly over high heat, such as grilling or roasting.
- Tenderloin:The tenderloin is another very tender cut of venison, and it is located inside the backstrap. It is best cooked quickly over high heat, such as grilling or roasting.
- Loin:The loin is a lean and flavorful cut of venison, and it is located behind the backstrap. It is best cooked over medium heat, such as roasting or braising.
- Ribs:The ribs are a flavorful and juicy cut of venison, and they are best cooked slowly over low heat, such as roasting or braising.
- Shank:The shank is a tough and sinewy cut of venison, but it is full of flavor. It is best cooked slowly over low heat, such as braising or stewing.
- Neck:The neck is a tough and sinewy cut of venison, but it is full of flavor. It is best cooked slowly over low heat, such as braising or stewing.
Here is a table illustrating the cuts of venison and their locations:| Cut | Location ||—|—|| Backstrap | Along the spine || Tenderloin | Inside the backstrap || Loin | Behind the backstrap || Ribs | Behind the shoulder || Shank | Front leg || Neck | Neck |
Processing and Packaging

Venison processing involves several techniques to preserve and enhance the flavor of the meat. After field dressing and skinning, the next step is to process and package the venison for storage and consumption.
If you’re into deer hunting, having a home deer processing setup can be a huge time-saver. You can quickly and easily process your deer right at home, which means you’ll have more time to enjoy the spoils of your hunt.
If you’re looking for a great place to go deer hunting, check out adams county ohio deer hunting . They have some of the best deer hunting in the state, and you’re sure to have a great time. Once you’ve got your deer, you can head home and start processing it.
With a little practice, you’ll be able to quickly and easily process your deer, and you’ll be able to enjoy the delicious fruits of your labor.
Grinding
Grinding venison is a popular method for making ground meat, sausage, and other products. It involves using a meat grinder to break down the meat into small pieces. Grinding venison allows for easy cooking and can be used in a variety of dishes.
Vacuum Sealing
Vacuum sealing is a method of packaging venison that removes air from the package, creating an airtight seal. This helps to prevent spoilage and extends the shelf life of the meat. Vacuum sealing can be done using a vacuum sealer machine.
Smoking
Smoking venison is a traditional method of preserving and flavoring the meat. It involves exposing the meat to smoke from burning wood chips or other materials. Smoking venison can create a variety of flavors and textures, depending on the type of wood used and the smoking time.
Packaging Venison
Properly packaging venison is essential for preserving its quality and freshness. Venison can be packaged in a variety of ways, including:
- Vacuum-sealed bags
- Freezer bags
- Butcher paper
- Plastic wrap
When packaging venison, it is important to remove as much air as possible to prevent spoilage. Vacuum sealing is the most effective method for removing air, but other methods can also be used.
Safety and Hygiene: Home Deer Processing Setup
Ensuring safety and hygiene during home deer processing is paramount. It minimizes the risk of contamination, injuries, and illnesses, protecting both you and your venison.
To maintain a safe and hygienic environment, follow these guidelines:
Personal Hygiene, Home deer processing setup
- Wash your hands thoroughly with soap and water before and after handling venison.
- Wear clean gloves and protective clothing, such as an apron and rubber boots.
- Avoid touching your face, eyes, or mouth while processing venison.
Equipment Sanitation
- Clean and sanitize all equipment and surfaces that come into contact with venison, including knives, cutting boards, and grinders.
- Use a bleach solution or a food-grade sanitizer according to the manufacturer’s instructions.
- Keep equipment covered when not in use to prevent contamination.
Venison Handling
- Store venison at a temperature below 40°F (4°C) to prevent bacterial growth.
- Use separate cutting boards and utensils for raw and cooked venison to avoid cross-contamination.
- Discard any venison that shows signs of spoilage, such as an off odor or discoloration.
Legal Considerations

Home deer processing is a great way to save money and get the most out of your deer. However, there are some legal considerations that you need to be aware of before you get started.
The first thing you need to do is check your local regulations to see if there are any restrictions on home deer processing. Some states require you to have a permit or license to process deer at home. Others may have restrictions on the types of deer you can process or the methods you can use.
Once you have checked your local regulations, you need to make sure that you are properly disposing of all waste and byproducts from your deer processing. This includes the blood, guts, and bones. In most cases, you will need to dispose of these materials at a licensed waste disposal facility.
Legal Considerations
- Check your local regulations for any restrictions on home deer processing.
- Obtain a permit or license if required by your state.
- Properly dispose of all waste and byproducts from your deer processing.
Final Summary

With the knowledge and techniques you’ve gained from this guide, you’re now equipped to confidently process your own deer at home. Remember, safety, hygiene, and proper handling are paramount throughout the process. Embrace the experience, savor the flavors, and enjoy the fruits of your labor!
Expert Answers
What’s the most important safety tip for home deer processing?
Always wear sharp knives and handle them with care. Avoid cutting towards yourself, and keep your fingers away from the blade.
How long can I store vacuum-sealed venison in the freezer?
Properly vacuum-sealed venison can last up to 2 years in the freezer.
Can I use a regular kitchen knife for field dressing?
While possible, it’s not recommended. A dedicated hunting knife is designed for the task and will make the job easier and safer.